 www.randysworkshop.net
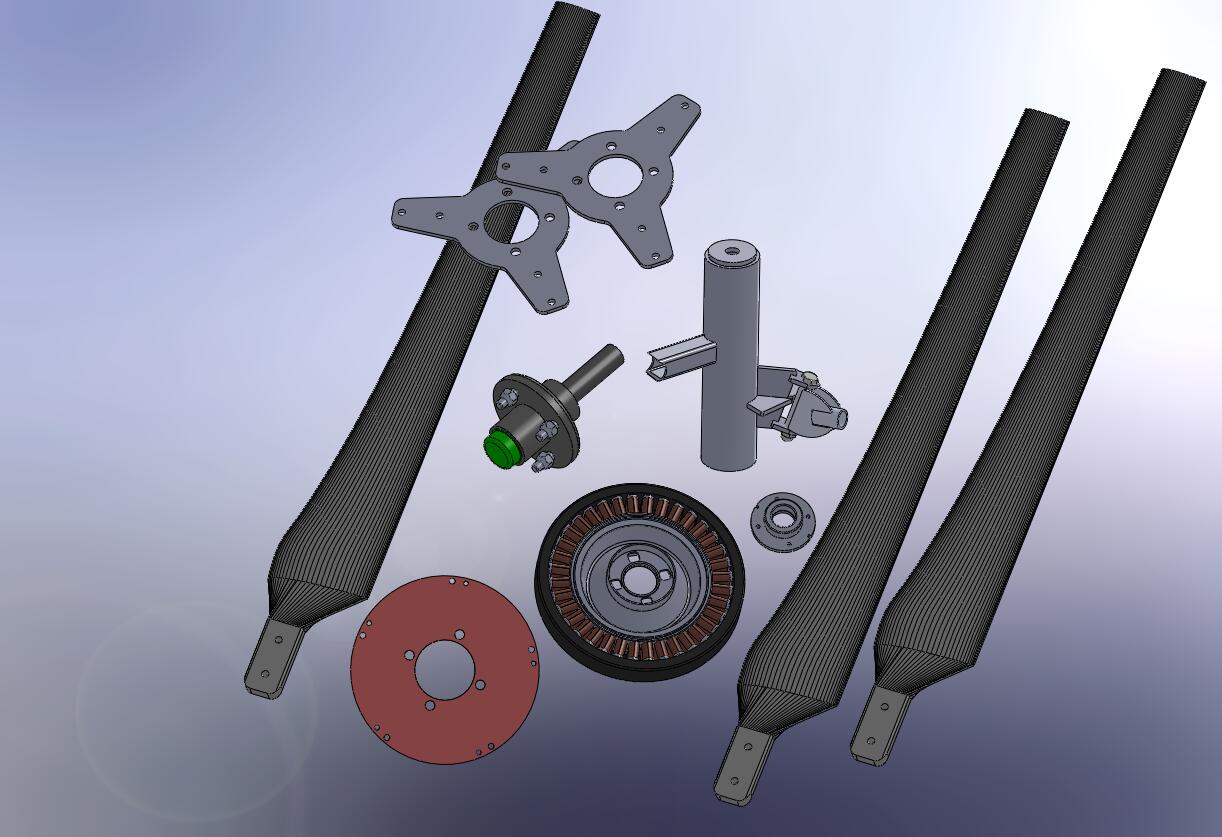 |
So you have done a great deal of investigating and are now looking at the possibility of using a F&P motor to generate electric. How difficult can it be? The following steps should help you decide if this is right for you. As you can tell, I am in love with these F&P motors. What do you need? That is up to you. Read through the following and you should get a pretty good idea. Maybe it might even give you some ideas on a way to make something different. My idea came from the www.otherpower.com webpage. Those people have been at this for quite some time. And their ideas are solid. |
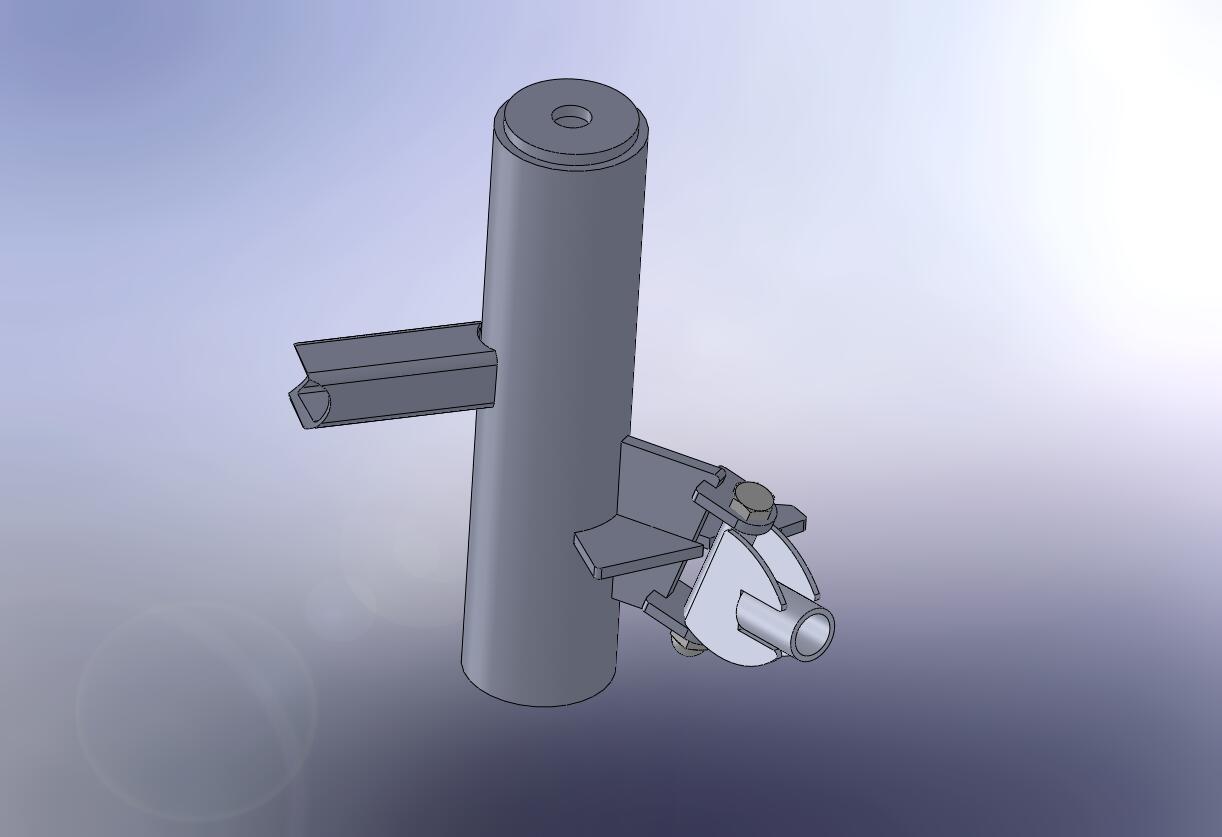 |
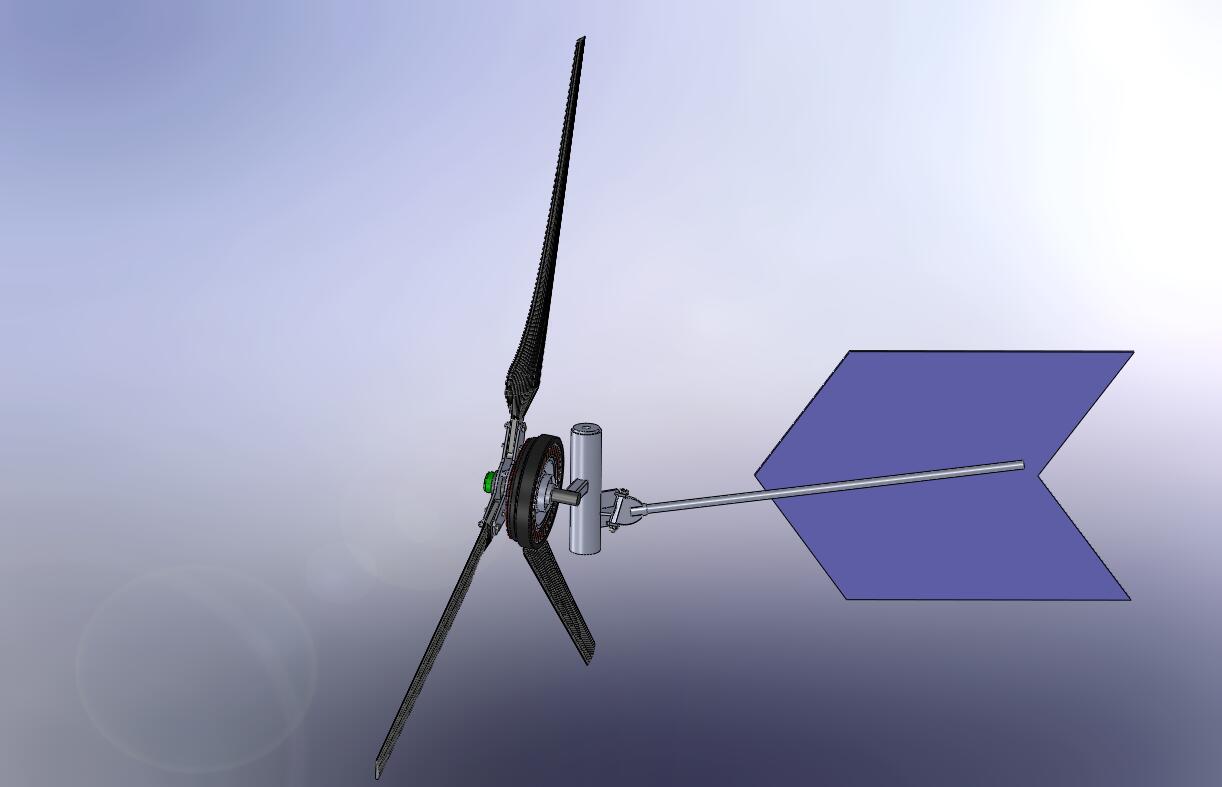
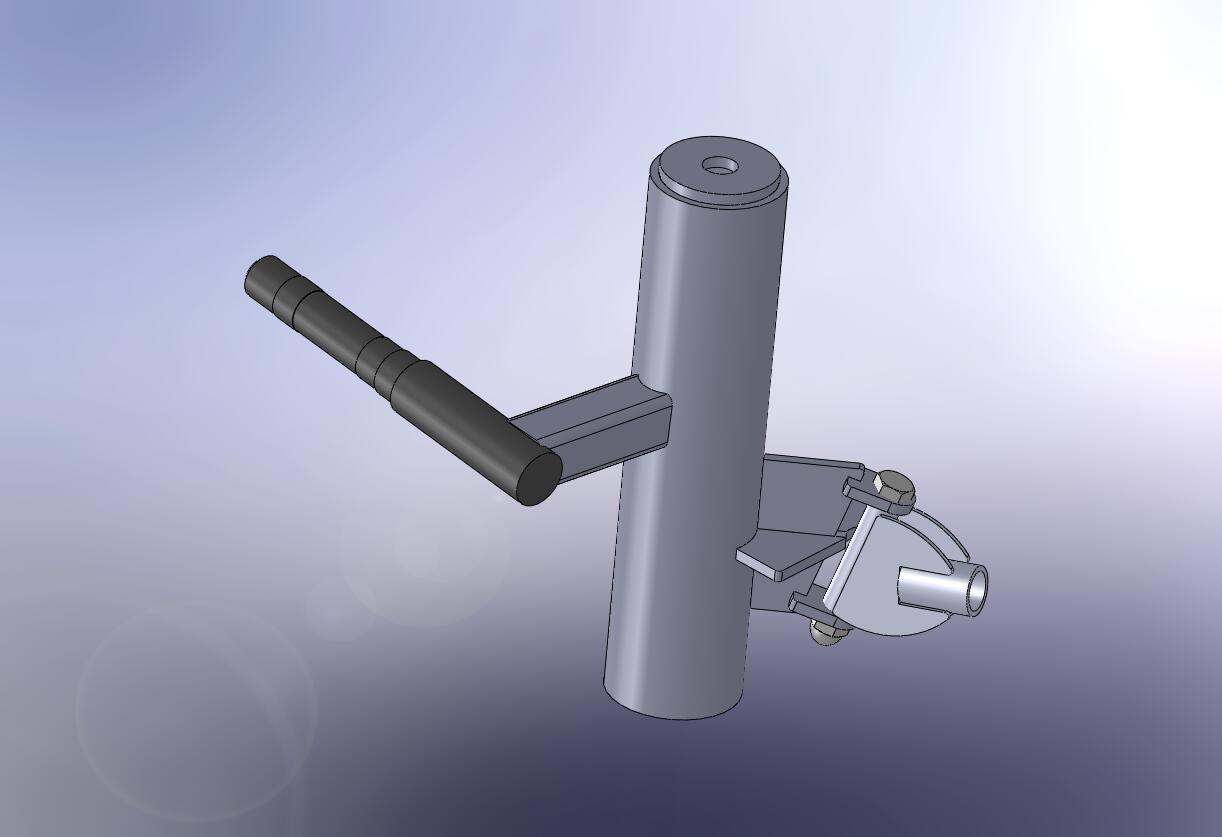
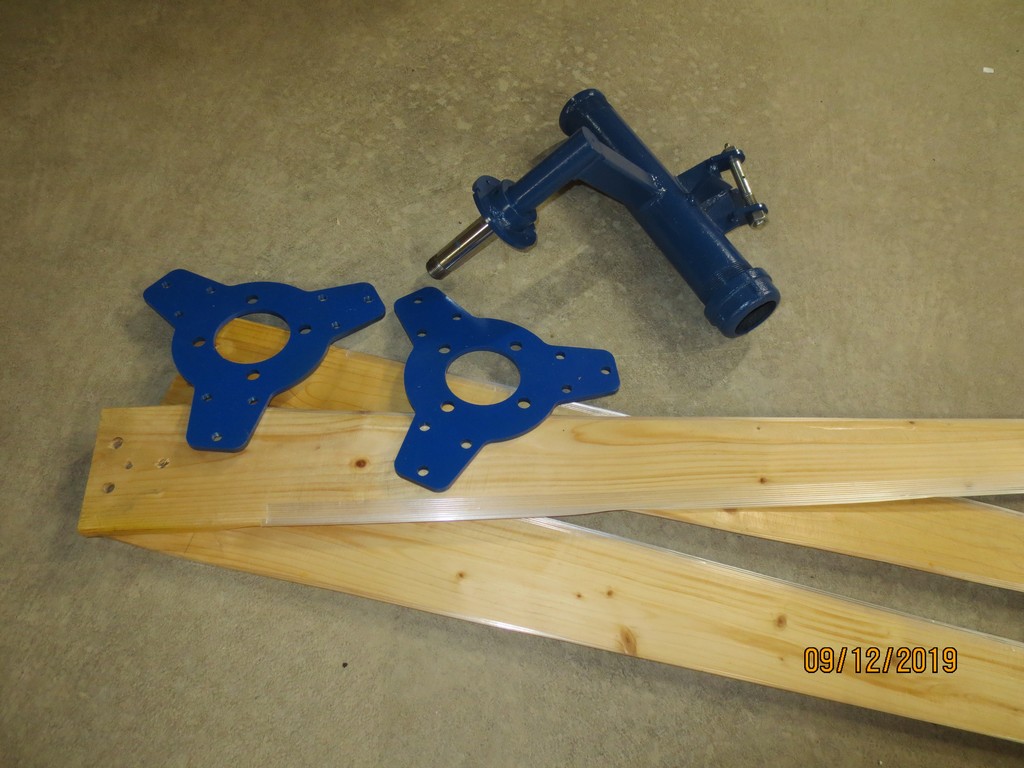
You do need some means of having the motor/generator pivot to face the wind. Like most people I chose to use a piece of pipe slipped over a pole. The pipe I chose to start with is 2-1/2" schedule 40 pipe. A thrust plate gets welded on the top, with the tail/vane pivot off the back and a piece of one inch square tube off the side. Detail drawings for these along with DXF files for the laser cut parts are included on the CD that comes with your order of the F&P SmartDrive Motor. |
|
|
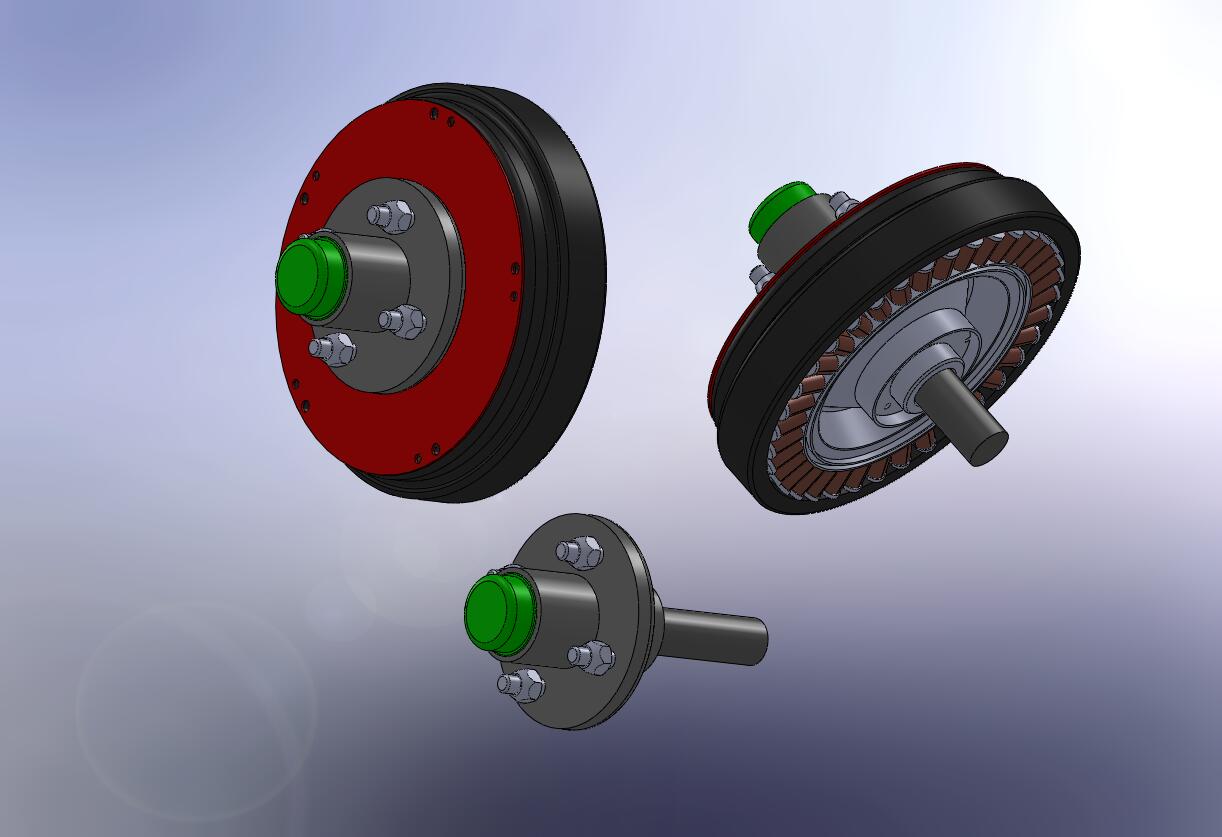
One of the first steps is to mount the F&P Motor to the trailer axle hub.I have made a webpage with detailed instructions to help you.http://www.randysworkshop.net/FPMount.htmlThis is the heart of the windmill. The key here is to adjust the location of the hub verses the stator so they spin without rubbing each other. The laser cut Hub Plate with its prepositioned holes helps maintain the concentricity of the hub. The stator can be moved slightly on the collet to get it centered. |
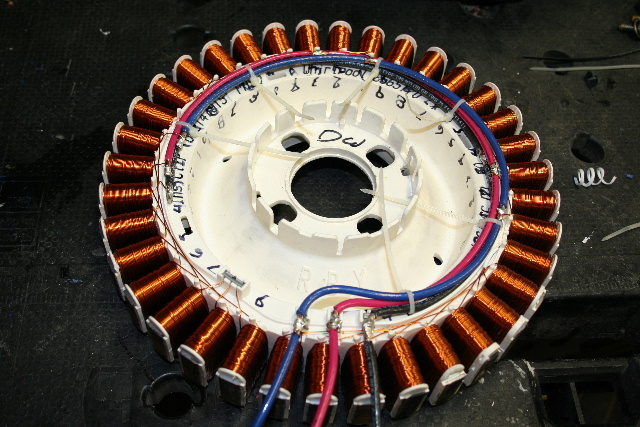 |
The next step is to rewire the stator . There are many different ways the stator can be wired. The one method that I like is four sets of nine coils. A web search will reveal more detailed instructions. |
 |
The re-wired stator is then bolted back onto the RWcollet weldment. The axle spindle is welded onto the pivot weldment and the whole generator can now be assembled. |
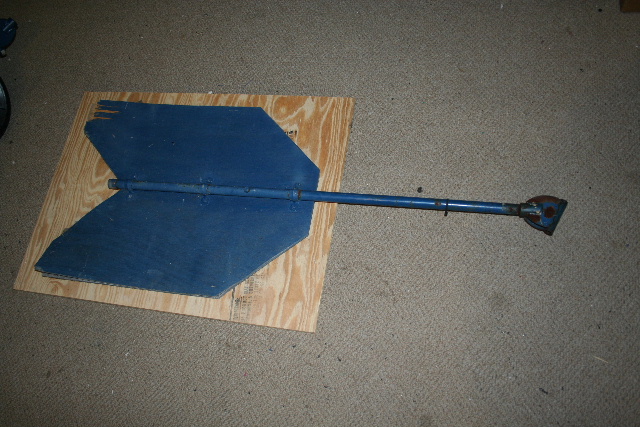 |
I'm cheating here and using an old tail/vane as a template to make a new one. The size is not critical. I'm starting with a 2' x 2' piece of plywood. The four foot piece of 1/2" pipe should be tightened to the pivot prior to mounting the pipe to the tail/vane. |
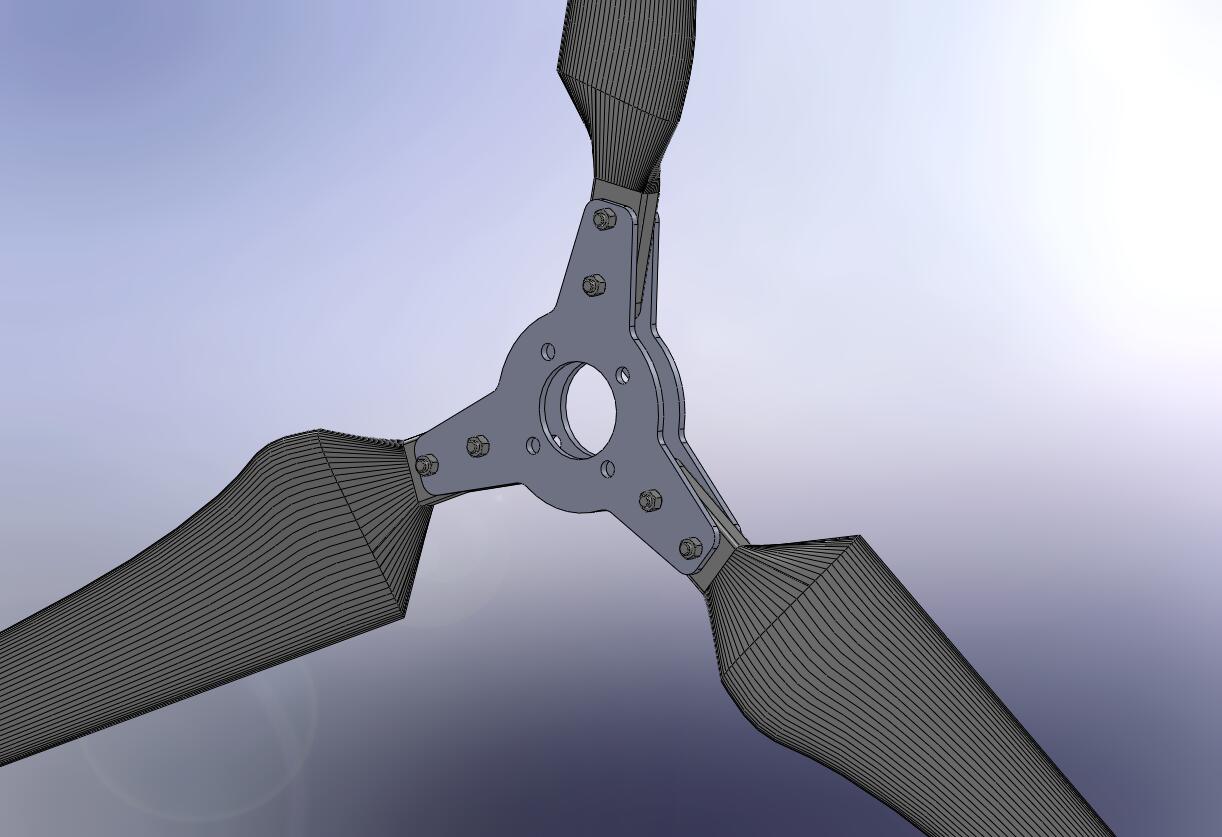 |
Mounting the blades can be done in several different ways. The easiest way is to sandwich them between two laser cut plates that then simply bolt onto the trailer hub using the lug nuts. A DXF file for the plates is included with the plans. |
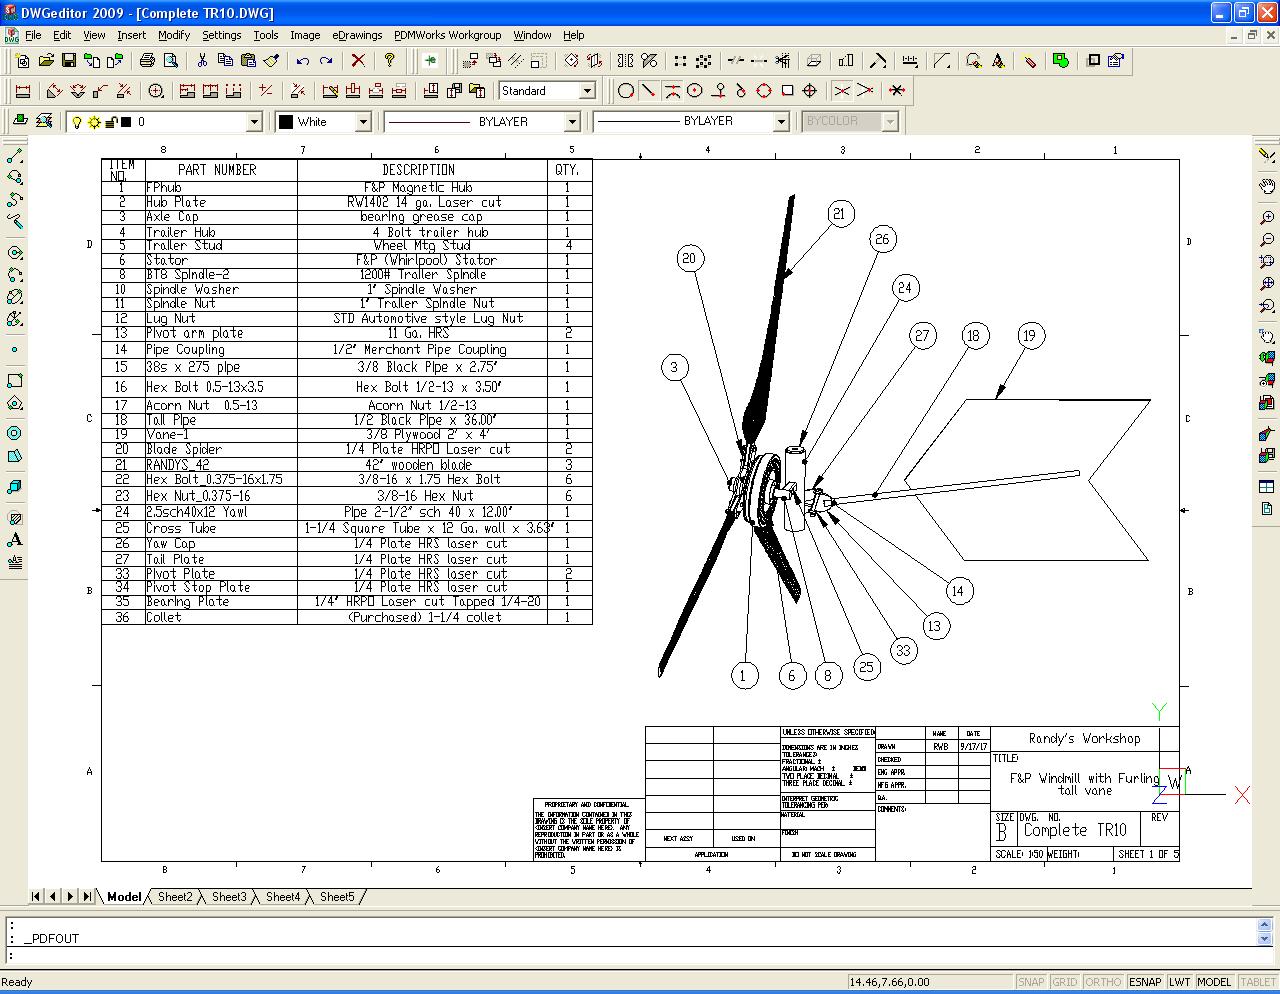 |
As mentioned before, a complete set of detailed drawing plans will be shipped with the purchase of a F&P motor at no additional charge if requested. Please respect my rights and do not resell these. |
 |
Here is a picture of my actual prototype. I used a store bought piece of threaded 2" pipe for my pole. I bored a pipe cap for the bottom so it would fit snuggly on my pole. The blades were bought off eBay and I went ahead and put a piece of fiberglass tape on the leading and trailing edges to protect them. |
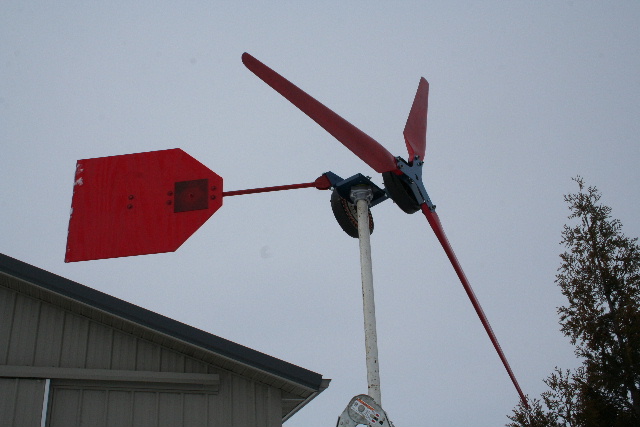 |
The F&P motor as a generator puts out about 0.9 watts per RPM. Of course it depends on how much wind you have available, but I would try using a 44"- 48" length balde for a swept diameter of about 8'. |
|
|